Homemade Bone Broth: A Step-by-Step Guide
- Niharika Prinsloo

- Mar 14, 2025
- 4 min read
Ever wondered why homemade bone broth tastes richer and has more health benefits than store-bought versions? Making your own broth at home is easier than you think, and the rewards are worth it. Not only is homemade broth packed with nutrients, but it also lets you control the quality of ingredients, avoiding preservatives and artificial flavors according to this official resource of the United States government.
In this guide, we’ll walk you through the exact steps to make nutrient-rich bone broth in your own kitchen. Whether you want to sip it straight, use it in soups, or add it to recipes, this step-by-step method will help you create a broth that is flavorful and full of health benefits.
In this article, I’ll cover:
Let’s dive into the simple yet powerful process of making homemade bone broth.
Benefits of Making Homemade Bone Broth

Homemade bone broth is a cost-effective and highly nutritious alternative to store-bought versions. Here’s why making it yourself is a better choice:
Better Quality Control – You choose the ingredients, ensuring no preservatives or artificial additives.
Higher Nutrient Content – Slow-simmered broth releases minerals, amino acids, and collagen.
Customizable Flavor – You can adjust the taste by adding your favorite herbs, spices, and vegetables.
More Cost-Effective – Using kitchen scraps like leftover bones and vegetable peels makes it budget-friendly.
If you want a broth that is both nutritious and delicious, making it at home is the way to go.
Essential Ingredients for a Nutrient-Dense Bone Broth
The quality of your broth starts with choosing the right bones. Here are the best options:
Beef bones – Marrow bones, knuckles, oxtail, short ribs
Chicken bones – Carcasses, wings, feet, drumsticks
Fish bones – Heads, spines, fins (for a lighter broth)
Pork bones – Neck bones, ham hocks
For the best results, use grass-fed beef or pasture-raised chicken bones. These produce a more nutrient-dense broth.
Other Essential Ingredients
Apple cider vinegar – Helps extract minerals from the bones
Filtered water – Avoids unwanted chemicals
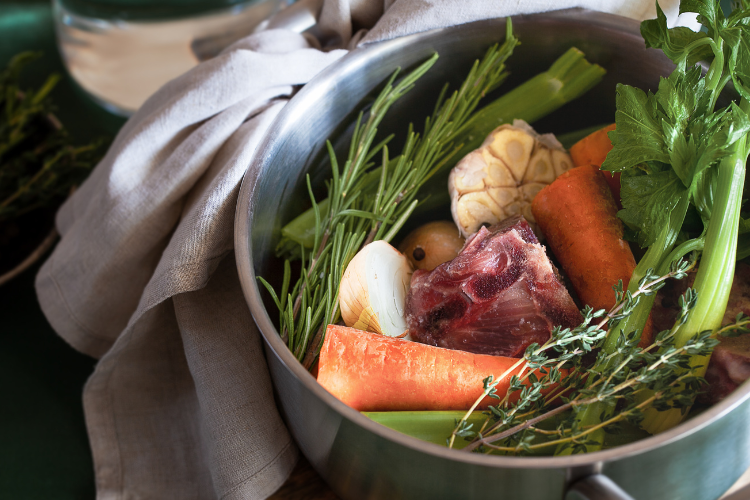
Aromatic vegetables – Carrots, onions, and celery for extra flavor
Herbs & spices – Bay leaves, garlic, peppercorns, thyme (optional)
With these ingredients on hand, you’re ready to start making your broth.
Step-by-Step Guide to Making Bone Broth
Step 1: Prepare the Bones
Gather about 2-3 pounds of bones for every gallon of water you plan to use. If using beef or chicken bones, you can use raw bones or roast them for extra flavor.
Optional: Roast the Bones
Roasting enhances the depth of flavor in your broth.
Preheat your oven to 400°F (200°C).
Spread the bones on a baking sheet.
Roast for 30-40 minutes, flipping them halfway through.
Remove and let them cool slightly before adding to the pot.
Step 2: Simmer the Bones in Water
Place the bones in a large stockpot, slow cooker, or pressure cooker.
Fill the pot with filtered water, covering the bones completely.
Add 2 tablespoons of apple cider vinegar and let sit for 30 minutes to help extract minerals.
Bring the water to a gentle boil over medium-high heat.
Step 3: Skim Off Impurities
As the broth starts boiling, foam and impurities will rise to the surface. Use a spoon or mesh skimmer to remove them.
This keeps your broth clear and free of any bitter flavors.
Step 4: Simmer for 12-48 Hours
This is the most important step. The longer you simmer, the more nutrients will be extracted.
Chicken broth: 12-24 hours
Beef broth: 24-48 hours
Fish broth: 6-12 hours
If using a slow cooker, set it on low for the recommended time. If using a pressure cooker, cook on high pressure for 2-3 hours for a quicker broth.
Step 5: Add Vegetables and Spices (Last Few Hours)
For extra flavor and nutrients, add:
Chopped carrots, onions, and celery
Bay leaves, garlic, thyme, or rosemary
A pinch of salt and whole peppercorns
Let these simmer for the last 3-4 hours (or 30 minutes in a pressure cooker).
Step 6: Strain and Store Your Bone Broth
Turn off the heat and let the broth cool slightly.
Use a fine-mesh strainer or cheesecloth to remove bones and vegetable scraps.
Pour the broth into glass jars or silicone molds for easy storage.
Storage Tips
Refrigerator: Up to 5 days
Freezer: Up to 6 months (store in small portions for convenience)
If your broth gels when cooled, that means it’s rich in collagen—a sign of a great bone broth.
How to Use Bone Broth in Your Diet
Here are some simple ways to enjoy your homemade bone broth:
Drink it straight – Warm a cup and add a pinch of sea salt.
Use as a base for soups and stews – Adds depth and richness to any recipe.
Cook grains with it – Replace water when making rice, quinoa, or pasta.
Use in sauces and gravies – Enhances flavor and nutrition.
Bone broth is versatile and can be used in almost any dish.
Common Questions About Bone Broth
Why is my broth not gelatinous?
Use collagen-rich bones like chicken feet, knuckles, or marrow bones.
How can I make my broth more flavorful?
Roast the bones first and add vegetables and herbs.
Can I reuse the bones for a second batch?
Yes, but the second batch will be lighter in flavor and nutrients.
Can I freeze bone broth?
Yes, in airtight containers or silicone molds for easy portions.
Final Thoughts
Making your own bone broth is a simple yet powerful way to add more nutrients to your diet. If you lack of ideas on what to prepare, check our Bone Broth-Marinated Steak recipe. Whether you sip it daily, use it in recipes, or freeze it for later, bone broth is an excellent addition to a healthy lifestyle.
If you don’t have time to make it from scratch, check out BROTHH’s high-quality, ready-made bone broths for the same amazing benefits—without the wait.
Start making your own bone broth today and enjoy its many health benefits.
Want to experience the benefits for yourself? Try BROTHHH’s premium bone broths today!
Comments